
One of the common questions we get from our customers is, “Which chip do I use to test my fluid?” RheoSense has a variety of different chips and you may wonder which chip would be the best for your application. The m-VROC® has four different designations of chips: A, B, C, and E. These letter values reference the max pressure capability of the MEMS pressure sensors inside the microfluidic flow cell. With the A-series being able to measure the lowest pressures for low viscosity fluids, the E-series are able to measure the highest pressures for higher viscosities and higher shear rates.
Remember, we measure viscosity by controlling the flow rate across the microfluidic channel and measuring the pressure drop. The flow rate is proportional to the shear rate and the pressure drop is proportional to the shear stress. Shear stress divided by shear rate gives you viscosity.
Not only do we have different MEMS pressure sensors available, but we also have different flow channel depths for each chip designation. We have flow channel depths of 20, 50, 100, 200, and 300 microns. This allows for 20 different combinations that allow testing of a wide variety of fluids at an expansive shear rate range. Now which combination of chip designation and flow channel depth is right for your application?
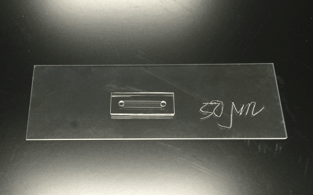
Left Figure: RheoSense VROC Dummy Chip, 50 micron flow channel
The easiest way to choose the correct chip for your application is with our chip selection spreadsheet (which you can find here).
To begin, estimate the viscosity range of the sample/s and enter those viscosities in the purple boxes (D4-D16). The next step is to choose which RheoSense viscometer you have or are going to purchase and pick the appropriate flow rate for that instrument. For example, VROC® Initium has a max flow rate of 1056 µL/min. Enter this number in the blue box (B9). (Note: for m-VROC there are more options as it is an extremely versatile platform.
Then select between the fast speed or regular speed pump and proceed to select the desired syringe size and enter the corresponding flow rate in B9.)
The next step is to choose the appropriate MEMS pressure sensor. For example, for low viscosity low shear rate select the “A” MEMS sensor with a max PSI of 10,000 pascals and enter this in the yellow box (B3). If you have higher viscosities or want higher shear rates select a MEMS pressure sensor with a higher max pressure.
The last step is to pick your flow channel depth. The green box lists the available flow channel depths (P16-21). When picking flow channel depths, be aware that if your sample has particles suspended, then the particles must be less that 10% of the flow channel depth. For example, if the flow channel depth is 50 microns, the maximum particle size can be no greater than 5 microns. Once all your parameters have been entered you will see the available shear rates for your sample(s) and the selected chip.
If you have questions or would like more information, please contact your RheoSense Technical Specialist.
Happy Measuring,
Dave Fox
Regional Sales Manager