.jpg?width=300&name=VROC%20Viscometers%20(blog).jpg)
Like with all technology, VROC viscometers can encounter errors. Our service specialists are trained to help diagnose issues and minimize downtime of your VROC viscometers. While our team is here for support, there are some simple, and somewhat common issues we have encountered in which end users are able to troubleshoot themselves. User maintenance is key when it comes to successfully using VROC viscometers. We are sharing some common troubleshooting for our different VROC instruments to help your team troubleshoot in house before escalating.
General Errors
1. My computer is having trouble connecting to the USB connected to my viscometer
This is a commonly seen roadblock but requires a simple tweak! The diagnosis to this issue is that your computer cannot detect the USB driver properly, hence your instrument is not connecting to the computer and software. To update the USB driver, please download the update located in the link below.
Directions:
1) Once at the site scroll down to the VCP Driver section.
2) In the Processor Architecture table, click setup executables in the comments section of Window 2.12.28.3. Follow the update instructions. Download the following file, unzip, and run it as administrator’s privilege. This should help resolve the issue when you relaunch software.
2. I am not seeing expected results when cleaning my VROC chip
Think about your sample and your cleaning. If your chip is reading viscosity slightly higher than what the cleaning solution is supposed to read, this means it may not be the best cleaning solution for your sample or there is sample accumulating inside the chip. You should first check the solution you are running. If your sample has a common solvent such as PBS, buffer, or isopropyl alcohol, it is recommended to check and try to run these solvents after for cleaning.
For storage purposes, it is recommended to ultimately get to a cleaning protocol that you can store your chip for prolonged periods of time. Storing for example in sugar solutions would not be ideal becuase the sugar solutions would stick to the flow channel.
A general tip, water is not a good cleaning agent for the following reasons:
- High surface tension – it is not the best agent for cleaning even aqueous solutions
- Potential of bubbles being trapped in the flow channel –Another result due to its high surface tension
3. My rsquared values are out of the 0.996 - 1.000 range
You could have an inhomogeneous sample, a bubble in your sample in the syringe, or a bubble can be forming inside the syringe due to high surface tension like water. See How to Remove Bubbles From Your Samples or Properly Loading Your Sample via Backloading to troubleshoot this error
4. My samples won't run through my chip/ I am getting a MEMS sensor error
Does your sample have particles? Double check the particle size and make sure it works with your chip.
RheoSense sells dummy chips that are designed to mimic your VROC chips. Dummy chips can help you optimize your cleaning protocol, test out new samples, and check particle sizes in samples before flushing through your actually VROC chip.  for more information!
5. I am not able to save excel or PDF properly.
This means your excel is either not properly installed or you need to log into your office 365 username. If your PDF is not saving this means the PDF creator was not saved properly. You can go and repair your install or manually install PDF creator. If you continue to have issues you can contact us for troubleshoot support!
.png?width=500&name=microVISC%20product%20page%20banner%20image%20(1).png)
microVISC™
1. microVISC will not connect with the software
First, try answering the following preliminary questions:
- Is my instrument on? Is the LCD Display functioning?
- Can you hear the motor running?
- Is my USB Cable connected to the laptop? Did I open the software after connecting and having the instrument on?
If you answered yes to (1) and (2) but the problem persists there are a couple of things you can try to do in-house before consulting a RheoSense support engineer:
First try the quick short test
- Click QUIT on the microVISC™ program (upper right-hand)
- Turn off the microVISC™
- Disconnect the USB from the laptop
- Reconnect the USB
- Turn on the microVISC™
- Initialize the program again.
If the problem persists, please try the second method:
- Open “Device Manager”
- Unfold “Ports(COM&LPT)”
- Turn on microVISC™ power
- Connect the USB cable to the computer
- Plug and unplug the USB cable a couple of times to see a COM port is mapped
- If not, you should be able to see a windows message that an unknown device is detected. Then microVISC™ USB driver should be installed again.
- The USB installation steps are described from Page 9 in the microVISC™ software installation guide.
2. Getting a System Error: INTER-CPU COMM
This error message occurs when there is something wrong with the microVISC PCB board. Try to turn off and on the unit and see if this error message disappears. When the error message persists, this is an indicator that your PCB board is failing at some location. Normally, your viscometer will not be able to run at this point. What to do next is to ship the instrument back to us for inspection and repair.
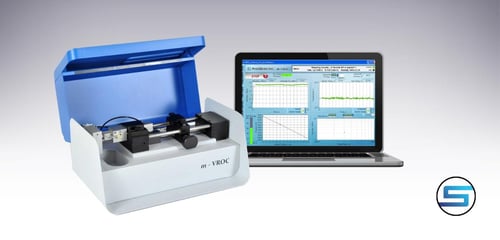
m-VROC®
1. My pusher block isn't budging
The m-VROC viscometer and software has an automatic safety feature that automatically is triggered when the software and viscometer is instructed to run at pressures that are much higher than what the particular chip configuration can handle.
To prevent potential damage of the chip, the pusher block will automatically go into lock mode and the software will send an alert that there is a pressure error. Sometimes, you will try to unlock the pusher block and you will notice that the pusher block will not budge. In this case, do not try to manually force the knob to the right to loosen the pusher block but head to the software. Re-connect the viscometer with the software (if not already) and head to the “Measurement Setup” tab.
Mouse-over the “pump control” tab and two buttons will appear. Click on the “clear stall” tab and the pump will automatically move the pusher block slightly to the back. You will hear a click and then you will be able to move the pusher block back and forth again
2. My m-VROC won't connect to the software
First, try answering the following preliminary questions:
- Is my instrument on? Can I hear the motor running?
- Is my USB Cable connected to the laptop? Did I open the software after connecting and having the instrument on?
If you answered yes to (1) and (2) but the problem persists where the viscometer cannot connect properly with the software, there are a couple of things you can try to do in-house before consulting a RheoSense support engineer:
This one is a quick, short test:
- Click QUIT on the m-VROC program (upper right-hand)
- Turn off the m-VROC
- Disconnect the USB from the laptop
- Reconnect the USB
- Turn on the m-VROC
- Initialize the program again
If the problem persists, please try the second method (m-VROC uses FTDI USB-serial converter chip, so FTDI USB driver is required)
- Open “Device Manager” (by clicking Windows Start button on lower left corner and type “Device Manager” on search window)
- Unfold “Ports(COM&LPT)”
- Turn on m-VROC power. Connect the USB cable to the computer. Plug and unplug the USB cable a couple of times to see a COM port is mapped.
3. I am getting a firmware "EEPROM Error"
This error message occurs when the connection between your chip and viscometer is not properly connected. Try disconnecting the chip and then reconnecting, make sure you hear a click noise to confirm that the cable has completely connected with the chip.
If the error continues to pop up, please take a look around the cable to see if there is any sample residue. If any visible reside remains or for safety purposes, please take a lint free wipe, wipe around the cable and try to dry the area completely with a can of compressed air.
Ideally, if you have multiple chips, try plugging it in with a different chip to see if the error continues to pop up.
If the error still pops up with a different chip, this is a good indicator that it is your unit and your unit can be shipped back to us for a replacement cable. Please contact us for RMA instructions and pricing information.
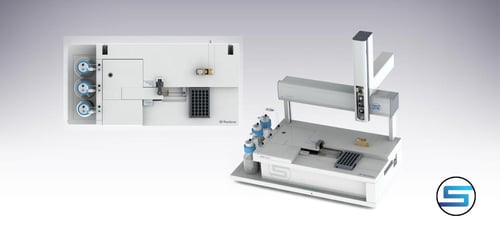
VROC initium one plus
1. My weight sensors seem to be off
Recalibrating the Solvent Bottle Weight Sensors instructions can be found in the VROC initium manual. If the reported volumes from the weight sensors are not accurate, the sensors may need to be recalibrated. To do this, click ‘Tare’ on the desired weight sensor.
A dialogue box will pop-up and guide you through the recalibration. First, unscrew the gas line, then the liquid line connecting the solvent bottle to the unit. Remove the solvent bottle from the solvent tray and press ‘Run’.
Place a 500g weight on the weight sensor. If you do not have a 500g standard weight, you can fill a bottle with water (or solvent) until its mass reaches 500g. When this is done, press ‘Run.’
The calibration is complete. Remove the weight and reinstall the solvent bottle on the unit. Remember to connect the liquid line before the gas line to prevent accidental spills.
2. I am getting an auto sampler validation error: "Autosampler ID does not match Calibration ID"
If you resave the calibration positions in expert mode it sets the AutoSampler ID to the correct ID. Wizard mode does not update the ID.
- Go to Settings> Service Utilities> Calibrate AutoSampler
- Select Expert Mode Calibration Utility
- Click Initialize AutoSampler
- Click Save and Exit
- Exit back to the Initium Software
3. The use counts number of my VROC initium septum is highlighted
This means it’s time to replace the septum.
- Unscrew the injection port aluminum cap, and remove the old septum
- Take out a new septum from the starter kit
- Place the new septum inside the injection port with the spring side facing downward
- Press firmly to make sure the septum sits properly in the injection port
- Screw in the cap
8. I am encountering errors in my viscosity measurements
The most common error we see is the selection of the wrong protocols. Before starting any job, make sure that the solvent in the solvent jar matches the Sample Loading Protocol and Cleaning Protocol that you have selected.
The RheoSense VROC® initium one plus automated viscometer was designed with consumable parts that could be more easily monitored and replaced by the user to minimize down time. It is important to establish a routine prior to initiating testing to assess the health of the consumables and then act to resolve any issues before proceeding. The advanced operational software facilitates this process with continuously updated use counts, thorough diagnostics, and troubleshooting tips to quickly identify the root cause.
Register for our live maintenance tutorial where we will review the key maintenance and troubleshooting steps to ensure continuous operation of your initium one plus.
Written by: Eden Reid, RheoSense Senior Marketing and Sales Operations