.png?width=300&name=m-VROC%20thumbnail%20Image%20(Act21%20Home).png)
We're still not out of the pandemic, but it's time to slowly return back to your lab. It may not be an everyday in person thing but you are now responsible for setting up all of your equipment and you need to start running experiments.
You recently purchased a RheoSense m-VROC, a small sample viscometer. With the optional temperature controller that enables you to control temperatures between 4 - 70 °C, you may have received one to two shipment boxes roughly around 24" x 18" x 16" to 17" x 17" x 17". Unbox the viscometer and water bath.
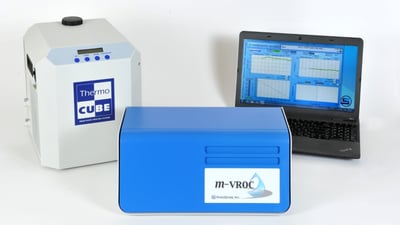
m-VROC should be in the 24" box and you should keep the custom made foam and ideally the shipping box in the future for shipping back for service or recalibration. Take the foam out and set your viscometer on a leveled lab bench with at least two plugs (ideally three - the third for your laptop) readily available to use on the lab wall. If you have the optional temperature controller, please open the 17" box and set the water bath on the equal level as your viscometer. We also recommend keeping the custom foam and box for any future shipments. (For customers who do not prefer this, we also do sell the packaging in the future if ever needed).
The viscometer and temperature controller will each need a plug to start. Make sure they are plugged in and use a acceptable lab computer (ideally Windows 10) to install and navigate the software. (Visit our customer portal for access to latest release notes and more goodies).
Your purchase and all initial quotes come with the following accessories:
- At least (1) VROC chip (ideally you should have two so you have one for backup or multiple if you have different applications or a wide dynamic range is important to you).
- Syringe jacket (depending on your sample size sensitivity, shear rate goals, you can purchase options from 0.5 mL, 1.0 mL, and 10 mL syringe jackets). Your RS Technical Specialist will be happy to help if you are not sure!
- Syringes that are compatible with the syringe jackets are always included (100 and 500 microliter syringes are compatible with 0.5 mL, 1 mL syringes are with 1 mL syringe jacket, and 10 mL syringes are with 10 mL syringe jacket). The syringes don't need to always be full to conduct successful measurements but the 10 mL syringe jacket and 10 mL syringe will be beneficial when it comes to high shear rates (1.4 million 1/s).
- Lint free wipes and lint free swabs - while we appreciate the standard lab wipes, please be careful when working with microfluidics. It is recommended that you use lint free wipes and also use a compressed can of air to ensure all of your lab glassware is fiber free.
- Peek union and needles - these are small accessories that will help ease the loading of your sample into your test syringe and also there is a filter in the union that helps prevent more fibers from going into the syringe
The syringe jacket may need to be installed in the viscometer itself but don't worry, it comes with the tool (like Ikea furniture) and instructions can be found on the manual - it's definitely easier than putting together furniture, don't worry. Once the syringe jacket is on, you can connect your chip and turn on the unit. A successful connection with your viscometer and laptop should be indicated on the software and will allow you to input measurement parameters to begin your sample testing.
Load your sample using a new syringe and peek union and needle (twisted on to your syringe). Once successfully drawn, make sure your syringe doesn't show any visible bubbles by tilting the syringe vertically and flipping it. Once the sample is ready, carefully insert the syringe into the chip inlet and twist the syringe into place. When properly installed, the syringe should sit quite nicely in the syringe jacket. Lock the black pusher block on the right side of the pump THEN open the chip valve by turning the valve to the left and close the syringe jacket. (It is important to do in this order).
Put in your measurement parameters and click run!
Here are some helpful videos as you explore your viscometer!
Want to learn more about your new m-VROC? Visit our customer portal 
Written by: Grace Baek, RheoSense Operations Manager